YOUR WASH CLOTH MAY BE THE REASON FOR YOUR WRINKLES AND ACNE


In spite of a strict skin care routine and clean diet, do you feel that your skin is aging faster than usual? Are wrinkles and crow feet popping up at early age even with a healthy lifestyle? Believe it or not, your wash clothes may be the culprit for your early signs of aging. Exfoliating with wash clothes has been popular these days. While wash clothes do a great job in exfoliation and removing the residue, cheap quality clothes/ improper and excessive use can do more harm than good.

 How I use Wash Clothes in my skin care routine? 

Everyone has their own way of incorporating wash clothes in their skin care routine. This is my way: First, I use a cleansing oil (mostly jojoba and castor oil mix) to clean off the dirt and makeup. Then, using my Body Shop Tea Tree Face Wash and Konjac Sponge, I wash off the oil and dead skin cells. Then, I take a Organic Bamboo Wash Cloth, wet it and wring off the excess water. I rub this wet wash cloth all over my face to remove any left over residue.

I always prefer to use high quality wash clothes, which are soft and gentle on my skin. I teamed up with Au Naturel in testing their wash clothes recently and fell in love with them since then. They are made with Cashmere silk and cotton, and are very gentle on the skin. These are unbleached, free from pesticides, dyes and are great for sensitive skin. Moreover, they are quick to dry.This comes in a pack of 6 and I use a fresh one for each day.

Bamboo has a natural anti bacterial agent called 'Bamboo Kun'. Because of this,  wash clothes made with Bamboo are anti bacterial, anti fungal and odor resistant. These are eco-friendly and 100% bio degradable. Also, bamboo trees grow very fast using very little resources. You know that you are doing good to environment while pampering your skin. That's what I love about organic wash clothes  <3

One mistake I see many people make is to reuse their wash clothes. Reusing the wash clothes can spread the bacteria and cause acne. so you need to use a clean one daily.  The ones I use are anti-bacterial and so, I use one for each day. However, if you are using a regular wash cloth, I recommend using a clean one for every single use. 

You can also use wash cloth to dry exfoliate your body. But remember not to over do it. Too much scrubbing is always bad for your skin. Hope you guys love the idea of bamboo wash clothes and will make a switch! 


DEL ORGANICS VITAMIN C SERUM REVIEW


I am a skin care junkie and I am obsessed with serums!! They are like my best friends. I am glad to team up with Del Organics in testing their Vitamin C Serum . I would like to share with you all the pros and cons I have experienced with this product.

Ingredients:
Vitamin C(20%), Ferulic Acid, Vitamin E, Vegan Hyaluronic Acid, Arginine(Amino Acid), MSM, Alovera, Organic Geranium Extract, Organic Dandelion extract, jojoba oil, Horsetail plant extract, PhenoxyEthanol.


What it Claims to do?
  • Boost Collagen Production
  • Repair sun damage
  • Lighten Scars
  • Brighten Complexion
  • Anti-aging benefits

What it actually did to my skin?

The best thing about this serum is  hydration. I can skip my moisturizer if I am in a hurry or don't feel like adding an extra layer on my skin that day. Some serums don't supply enough hydration  and I need a moisturizer to keep my skin hydrated. But this one passed my hydration test. It instantly gets absorbed into the skin. The hyaluronic acid boosts collagen production and it was evident on my skin.I did not have any sun damage so I can not comment on that part. Ferulic Acid and Vitamin E in this serum are supposed to offer UV protection benefits.

I have a few acne scars but i did not notice any improvement in their appearance. I have been using this serum for 2 weeks now and may be, this is a short time to expect results in terms of scar fading. I will keep using it and will update you ladies on the results.Did it brighten my complexion? I have to say Yes!! This serum claims to inhibit the production of Melanin. I find that a few Vitamin C serums I have used do a really great job in brightening up the skin and this is the new member of my skin brightening list.

PROS:
  • Light weight and instant absorption
  • Good hydration levels for a serum
  • Brightens Complexion
  • Mild smell 
  • Good packaging 
  • Not tested on Animals

CONS:
  • Did not see results with lightening scars
  • Contains PhenoxyEthanol

Rating: 4/5


MAKE YOUR OWN TOXIN FREE SIGNATURE PERFUME/DEODORANT

Origins of perfumery, the art of perfume-making can be found in ancient Egyptian culture. A perfume should be like your personal signature. The scent you put on your body should depict your tastes and personality. In our busy daily lives, we meet several people and perfume is something that leaves our mark on them and lingers in their mind even when we are gone. It is like the first impression that you can make on others and that should be the best impression. Today, the cosmetic world is drenched in tons of perfume brands. I still remember the 15 year old me heading to the local drugstore, getting dragged to the fancy ‘Try me!!’ perfume bottles sitting in the shelves, sniffing and spraying every scent one after the other onto my wrists and elbows in order to choose my signature scent. Fast forward 9 years, I am 24 today and my knowledge on natural health and beauty grew up along with me. Synthetic fragrances contain many toxic ingredients like benzene, aldehyde, phenols, phthalates and parabens. They may cause cancer, nervous disorders, birth defects and hormonal effects.  Antiperspirants and deodorants contain aluminum as the main ingredient because aluminum can temporarily block the sweat pores and thus regulates the flow of sweat. Unfortunately, that’s how antiperspirants work!! They mess with the natural process of sweat production! In addition, they produce estrogen-like effects in our body. Researches have shown that increased estrogen production increases the risk of breast cancer. Parabens also get built up in breast cells and mimic the effect of estrogen. Our skin absorbs 60-70% of the topical products we use on it and when it comes to underarms, the percentage of absorption is even more. The nicks formed during shaving result in extra absorption of these chemicals.
 I realized that I never whole-heartedly liked those synthetic smelling artificial fragrances and my heart longed for something close to the nature, something that bonds me with the Mother Nature and something that adds to my personality. The hunt to satisfy my need for a natural non-toxic perfume and deodorant landed me in the wonderful and amazing world of essential oils. Now that I have convinced you to search for natural alternatives to your signature collection by narrating the horror story of synthetic fragrances, I would like to provide you with a basic idea on how to prepare your own concoctions of perfumes. Essential oils when included in perfumes not only make you smell great but also give health benefits on inhalation. So get ready to kill two birds with one stone!!!
 For all the fellow DIY freaks out there, this is for ya!!
Things we need for a DIY perfume are:
  • Sterilized blue or amber glass spray bottle
  • A base (can be alcohol or a carrier oil)
  • Essential oils for your choice
First, start with the base. If you want to choose an alcoholic base, you can go with organic grape seed alcohol or 100% absolute vodka. If you wanna go with carrier oil as base, jojoba oil can be your best bet because this magical oil has good keeping properties and can hold the fragrance of the essential oils for a longer period. Now let’s go to the fun part!! That is choosing and mixing the essential oils. First, visualize your perfume and decide on what feeling you want your perfume to convey about yourself. Femininity, bubbliness, freshness – which one you wanna sport? Do you prefer the floral scents or woody scents or beachy scents? The scents like rose and jasmine give a feminine touch whereas the citrus, wood, spice and herbal scents give a masculine touch (which means deep and warm, not that only men should use them).
Essential oils can be divided into three notes – Top Notes, Middle Notes, and Base Notes. Top notes are the scents that are highly noticeable in a perfume. They create the first impression on the perfume and they fade away within 10-15 min. Middle notes, also known as heart notes, give dimension to the perfume. They come into action right before the top notes start to fade away and linger for about 30-45 minutes. Base notes stay on your body for a longer period of time and they prevent the top and middle notes to evaporate too quickly. These scents soften over time and this is the last thing you smell before your perfume completely fades.  It holds the top and middle notes together. Oils like Cedar Wood, Rosemary, Eucalyptus, Basil, Lemon, Clary Sage and Tea Tree form the top notes. Oils like Jasmine, Ginger Lavender, Cardamom Ylang Ylang, Rose, Peppermint, Juniper, Chamomile and Black Pepper form the middle notes. Oils like Neroli, Frankincense, Sandalwood, Cinnamon, Patchouli and Vanilla form the base notes.  Your essential oils can comprise of the quantity anywhere in between 15-30% of perfume. 1 ml is equal to 20 drops.  For easy calculations, convert the amount of essential oils and base you want to add in terms of drops and rock your favorite scent!!
If you are not a perfume kind of person and loves solid deodorant sticks, girl! I got ya covered too!!My go to recipe for DIY natural deodorant is:
  • 3 tblspoons coconut oil
  • 3 tblspoons baking soda
  • 2 tblspoons shea butter
  • 2 tblspoons arrowroot powder
  • 1/2 tblspoon bentonite clay (use a plastic storage container if you add bentonite clay)
  • 1 tblspoon beeswax
  • 1 tblspoon vitamin e oil
  • 5 – 10 drops of essential oils of your choice (lavender and eucalyptus are my fav)
 Warning: Always do a skin patch test before experimenting with any essential oils as they are highly concentrated.

HOW TO DO A GREEN TEA FACIAL AT HOME


Hi All, I have previously posted about how to do Fruit Facial at home. I would like to add to the series by sharing how to do a Green Tea facial at home. Green Tea is rich in anti-oxidants and is great for anti-aging. If you are suffering from puffy face, then you must give this facial a try, because green tea is great for reducing puffiness and shrinking your pores. Lets get into the details:

CLEANSE: Cleansing the basic step before starting any facial. This step gets rid of the dirt and leaves a clean slate for the ingredients to work their magic on your skin. Using any of your favorite cleanser, wash off all the dirt and grime.My favorite is the St Ives Green Tea Cleanser

EXFOLIATE: Time to exfoliate, Baby!! Exfoliation is the key to remove all the dead skin cells and give you a glowing skin. Empty a green tea bag and take a small portion of those leaves. Add some honey to it and mix well. Use this mixture to scrub the dead skin away! I also like to use St. Ives Scrub Green Tea Scrub to exfoliate sometimes.

STEAM: Now it's time to open up those pores!! Learn about the Benefits of Steaming and how to do it at home . For this facial, I prepare the facial steam by emptying the contents of two green tea bags into the bowl and a drop of tea tree essential oil(optional). Rub your face with an ice cube to close the pores.Keep aside the remaining water in the bowl for later use. 


MASSAGE: Massage is the most important step for any facial. To prepare the cream for massage, I use a mixture of Matcha Green Tea Powder (1 teaspoon) and yogurt(1 teaspoon). If you don't have Matcha green tea powder, empty the contents of a green tea bag into a blender and blend it with yogurt to form a smooth paste. You need to use upward strokes while performing the massage.Upward strokes lift your skin against the gravitational force, giving you a more youthful look. Massage also helps to relieve the tension from the facial muscles and promotes relaxation.


FACIAL MASK: I use Etude House Green Tea Sheet Mask  every time I do this green tea facial. It is very relaxing and effective. If you don't have this sheet mask, you can make your own. Take a paper napkin and cut it in a shape that fits your face(leaving eyes and lips open). Dip it in the water bowl infused with green tea and place it on your face for 10-15 minutes.  Remove the sheet mask and pat the excess liquid into the skin. 

Your skin feels less puffy and pores seem to shrink. It is a great anti-oxidant rich facial. Give it a try and let me know in the comments what do you think. Stay beautiful  and happy <3


BENEFITS OF FACIAL STEAMING AND WHY YOU SHOULD INCLUDE IT IN YOUR SKINCARE REGIMEN

Facial Steaming is a great way to relax your skin after a long, tiring day. If steaming is not a part of your skin care regimen, you should include it today itself!! I will tell you why -- Steaming has a lot of benefits apart from relaxation. Here are a few of them:

  • It helps in deep cleaning the pores 
  • Skin renewal
  • Loosens up the blackheads and whiteheads so they are easy to remove after facial steaming.
  • Improves circulation to your face.
  • Loosens the dirt and other gross stuff that is hard to get rid of with normal cleansing.

Process: 
Step 1: Add 5-6 cups of water to a bowl and bring it to boil. Add herbs/essential oils of your choice.
Step 2: Place it on a table or a convenient place for you to sit and place your face above the bowl.
Step 3: Pull back your hair and wash it with a mild cleanser before steaming. You can also use a mild scrub to scrub the dead cells away.
Step 4: Take a towel and drape it over your head. The towel should cover your head and the bowl.  Lean over to the bowl of hot water and place your head nearly 12 inches away from the bowl. Find your comfort zone. If you feel you need more warmth, then move towards the bowl or if you need less, move a bit backwards. You got the idea, right?
Step 5: Breathe deeply. Relax and take deep, longer breathes. Stay there for like 10-15 minutes. 
Step 6: Remove the towel. Your pores are all open at this point. If you have any blackheads/whiteheads, this is the perfect time to remove them. Wash with lukewarm water. 

Many people stop at this point, thinking that their pores are all clean and good to go. But the most important step people often tend to forget is, to close the pores back. If you don't close them right away, dirt will accumulate in the open pores, doing more harm than good. So take some ice cubes and rub it all over the face. If you have sensitive skin, then tie the ice cube in a cotton cloth and rub it all over your face, so there is no direct contact between the ice cube and skin, but you still get to close your pores. Finish off by washing with cold water. Moisturize as usual.

So easy, right?? Happy steaming ladies!! c ya all in next post!! <3


DIY ALL NATURAL FACE MASK TO TREAT ACNE

Hi ladies! Today I am gonna share with you all, my favorite face mask that I swear by whenever a zit pops up on my face. It is completely natural and is very effective in treating the pimples.  Pimples are caused by a type of bacteria called Propionibacterium and all the ingredients used in this face mask aim at killing this type of germs. At the same time, they also nourish and heal your skin unlike drugstore acne lotions that dry out your skin like crazy!! You just need four ingredients and two of them are available right in your kitchen --

1. 1 teaspoon Yogurt
2. 1 teaspoon Honey
3. 1 teaspoon Neem powder/Fresh Neem leaves paste
4. 1 teaspoon Tulsi Powder/Fresh Tulsi Leaves paste.   (also known as Basil)

If you are an Indian, you will pretty much be familiar with Neem and if you have access to a Neem tree, just pluck some leaves and throw them in a blender to make a paste. For others who don't have access to Neem and Basil trees, you can buy them in powdered form from any Indian grocery store. They are easily available and cheap.

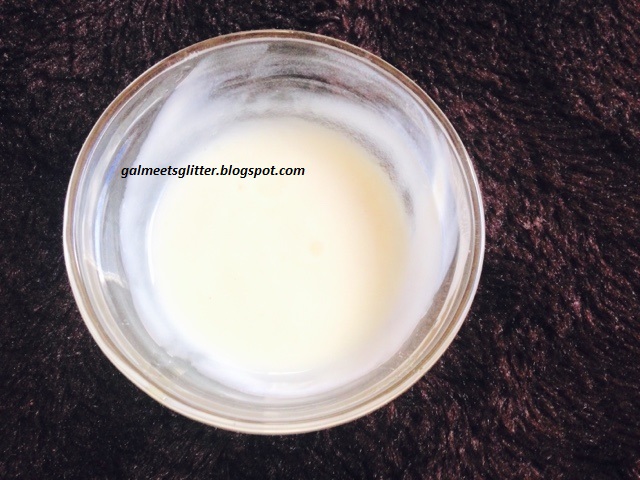
First, mix honey and yogurt very well. See the picture below and you should get a consistency like this.

To this, add neem and basil and mix.  Apply a thin even layer of this mask all over the face leaving the eye area. After 5 minutes, you will notice a tight feeling on your skin, which means the mask is drying. At this point, lightly mist your face with rose water spray.  Apply another even layer over the first layer. Leave this mask on for 30 minutes. Meanwhile, whenever you get that tight feeling on your skin, lightly spray the rose water to keep it wet. This process will help in leaving the mask for longer time on your face without getting dry and cracked. 

Okay, I will now tell you how each of these ingredients work in making your face pimple free. 

Yogurt: Yogurt has good cleansing properties. The lactic acid present in Yogurt has the capacity to kill certain types of bacteria and can restore the PH balance of your skin. When the PH balance is maintained, acne cannot thrive!!

Honey: Honey is a great anti-bacterial agent and nourishes your skin from within. It kills the pimple causing bacteria and is rich in vitamins like B2, B3 and B5. The market is flooded with honey based  acne creams, so why not curate your own mask at home? If you can. try to use raw, unfiltered honey because it is the purest form of honey and has maximum benefits. It helps in alkalizing the face!

Neem: Neem is my favorite beauty staple!! It makes skin glow and the salicylic acid present in Neem helps in treating the pimples. Salicylic acid is the most popular ingredient in the acne treating products. Neem has it in the natural form and is the best natural alternative to those chemical ladden, expensive creams. It is rich in anti-oxidant and anti-bacterial properties. It also prevents your acne from scarring and helps the already present acne spots to fade. 

Basil: This magical herb can also kill the pimple causing bacteria. This, in combination with Neem, can cure not only acne, but also most skin related infections. 

Use this mask consistently for best results. I personally see the difference just after the first time of using it. Whenever I use neem on my face, it glows and with consistent use, gets rid of the pimples and spots, leaving behind a flawless skin!! Let me know how this worked for you in the comments :)
Good luck!!


5 common skin mistakes that you are probably making everyday--Avoid these and stay fab!!

All of us want a healthy, glowing and youthful skin. But did you know that these 5 common things you are doing to your skin unknowingly are aging it?


Sleeping on sides:
Yes, your sleeping position has a great impact on your skin's health. When you sleep on your sides, the gravitational force is acting on your cheeks, making them sag. Also, the pressure that is applied on your face while sleeping in this position, is bad for your skin. Try to make it a habit of sleeping on your back with your head facing towards the ceiling. 


Touching your face:
If you are some one who can't resist the habit of touching your face all the time, then you need to stop doing that immediately. Because, your hands are the dirtiest parts of your body and placing them on your face will transfer bacteria, making your acne even worse.
Even if you don't have acne, it is not good to touch your face all the time.

Improper cleansing and cream application:
Whether you are cleaning your face or applying moisturizer after that, there is a right technique to follow. Don't rub your face as if you are cleaning a dish. Wet your face by sprinkling water and use gentle, circular motions to lather the cleanser on your face. Later, gently tap and pat the cream on to your skin.


Not cleaning your phone:
Your phone is one thing that repeatedly comes in contact with your face. Neglecting to clean it regularly can show its effect on your skin. Wipe your mobile screen with an anti-bacterial wipe every day.

Not cleaning enough:
You need to clean your face atleast once a day. If you are some one with oily skin, then you need to make it a point to clean it twice a day. Failing to do so is the most common reason for acne and other skin issues.


Over cleansing:
While not cleaning enough is bad for your skin, over cleansing is equally bad. Cleansing your skin more than necessary will make it dry and tricks your glands into producing more oil, thereby making your oily skin more oily. 

Unclean pillows:
This is the most common culprit for acne.  Your face comes in touch with the pillows  while sleeping and an unclean pillow is a  nightmare! Change your bedding and pillows frequently, atleast once a week.

So girls, avoid these silly mistakes and let your skin stay fab!! Keep smiling😊

(Pics Disclaimer: Downloaded from Google for this blog post)